Step1
Download the Oracle Identity Manager 11 G and also dependent components from the Oracle Website Oracle Identity Manager 11 G Download.
Download Details
1) Oracle WebLogic Server 11gR1 (10.3.3) + Coherence + OEPE - Package Installer
2) SOA Suite (11.1.1.2.0)
3) SOA Suite (11.1.1.3.0)
4) Repository Creation Utility (11.1.1.3.3)
5) Oracle Database 11g Release 2 Standard Edition, Standard Edition One, and Enterprise Edition
6) Oracle Identity and Access Management (11.1.1.3.0)
Step2
- Installing Oracle Data Base 11g Release2
I have installed the Oracle Database Release 2 based on the reference of pythian blog and web site details are given below.
Installing 11 Data Base
Note: I have followed above link to install the Oracle DB from step0 to step9.
Ubuntu OS Kernel Parameter Setting
Login as a root and edit the /etc/sysctl.conf and add the following parameters at the end of the line.
kernel.shmmax = 536870912
kernel.shmmni = 4096
kernel.sem = 250 32000 100 128
fs.file-max = 6815744
net.ipv4.ip_local_port_range = 9000 65500
net.core.rmem_default=4194304
net.core.wmem_default=262144
net.core.rmem_max=4194304
net.core.wmem_max= 1048576
fs.aio-max-nr= 1048576
Run the sysctl -p command and it reload the sysctl parameter.
Edit the /etc/security/limits.conf file and add the following parameters at the end of the line.
oracle soft nproc 2047
oracle hard nproc 16384
oracle soft nofile 1024
oracle hard nofile 65536
session required /lib/security/pam_limits.so
session required pam_limits.so
Step3
Unzip the Oracle Data Base files.
unzip linux.x64_11gR2_database_1of2.zip
unzip linux.x64_11gR2_database_2of2.zip
Step4
Installing Oracle DataBase Release 2
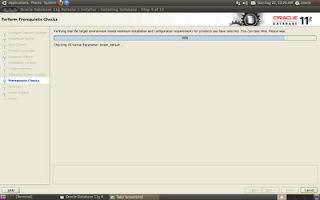
Go to the database directory and run the ./runInstaller. Please follow the following screen shots to install the database release 2.
Please continue after getting the error message.
Login as a root and execute the above scripts.
After executing the scripts and Click OK button. It will finish the installation After Clicking OK button
Step5
Creating Data Base Instance
Open the Terminal Window in Applications >> Accessories >> Terminal
run the following command
source /usr/local/bin/oraenv
oracle@ubuntu:/u01/app/oracle/product/11.2.0/dbhome_1/bin$ ./dbca -silent -createDatabase -templateName General_Purpose.dbc -gdbname orcl -sid orcl -responseFile NO_VALUE -characterSet AL32UTF8 -memoryPercentage 30 -emConfiguration LOCAL
Enter SYS user password:
Enter SYSTEM user password:
Enter DBSNMP user password:
Enter SYSMAN user password:
Please provide the password for the sys, system, dbsnmp,sysman
Step6
Config Changes in the dbstart, dbshut and oratab files
Modifying the dbstart and dbshut files in the /u01/app/oracle/product/11.2.0/dbhome_1/bin directory.
edit the dbstart and dbshut file and modify the ORACLE_HOME_LISTNER path
ORACLE_HOME_LISTNER=/u01/app/oracle/product/11.2.0/dbhome_1/
edit the /etc/oratab and comment the existing one and add the following content at the end of the line.
orcl:/u01/app/oracle/product/11.2.0/dbhome_1:Y
Step7
Starting the DB instance
dbstart
Stoping the dbinstance
dbshut
Step8
Verifying the Oracle DB instance
Open the terminal window and type sqlplus. It opens the sqlplus window and enter the user name as sys as sysdba and password as provided at the time of db instance creation. If you login successfully then your db instance is ready to create the rcu repository.
Step9
RCU Repository Creation


I had some hickups following above steps
ReplyDelete1. Installation prereqs will fail even i made the changes in system files. You have to restart the ubunto to make them effective
2. the dbca command would fail complaining UnsatisfiedLinkError exception loading native library: njni11
I had to run the below commands
sudo apt-get -f install
sudo apt-get install build-essential libaio1 gawk ksh
Great insights! I really appreciate how clearly you’ve outlined the topic. Your post has provided some valuable clarity. Thanks for sharing!
ReplyDeleteOracle Identity Manager 11g is not Host Bet officially supported on Ubuntu 10.04, but you can attempt installation by following Oracle's generic installation guidelines for Linux with workarounds for unsupported platforms.
ReplyDeleteThis comment has been removed by the author.
ReplyDelete